This video, recorded by EH! member Juliane Van Lieshout
explains why composting food waste is so important.
explains why composting food waste is so important.
For the Love of Composting
What people are doing in the Haliburton Highlands
THE INCREDIBLE SEED GUIDE TO BACKYARD COMPOSTING
Posted by Margaret Hoegg on May 03, 2019
https://www.incredibleseeds.ca/blogs/news/the-incredible-seed-guide-to-backyard-composting?comment=24604541005&fbclid=IwAR0_lB2ksTNgA2vdG_t19iUt_DKSE9vyFen1CPnbWuyRD1H3jOzNIUxG8gM#comments
It’s International Composting Awareness Week, so we thought it perfect timing to share our love of black gold and everything that goes into making it! Good, rich, organic compost is as good as gold to the organic gardener or farmer, and soil health is critical to environmental resilience. Composting - and educating others about it - is one action you take against climate change!
“The 2019 ICAW theme, ‘Cool the Climate - Compost!’ recognizes the connection between soil health and climate. By composting, carbon captured by plants from the atmosphere is returned to the soil. In addition, the compost, when returned to the soil, provides resistance to drought and disease, adds nutrients, improve its workability and reduce the release of nitrous oxide.” (From the Compost Foundation website.)
Our job as gardeners is to build up the organic matter in the soil, and continue to replenish the nutrients that our plants need to thrive. There is a proverb (of unclear origin - some say it’s Japanese, others Chinese)
“The poor farmer grows weeds
The fair farmer grows crops
The Good farmer grows Soil.”
If you invest time and energy into caring for the soil, you’ll be rewarded with healthier, more nutrient dense food! You can buy good organic compost (though sourcing it can be tricky depending on where you live), but there are so many benefits to making your own compost!
BUILDING A BACKYARD COMPOST:
COMPOST SYSTEMS
Your compost pile could be as simple as a heaped pile at the corner of your yard, or even a trench dug in your garden. We do this in the Fall, after the garden has been put to bed and before the ground freezes. Trench composting is a slower anaerobic process, but still a great alternative to the landfill if you don’t want an above ground compost.
A compost pile is generally easier to manage if you contain it with chicken wire, wood, or a covered bin. A single compost bin is fairly self-explanatory - it can be contained however you like. Some regions and municipalities may even provide residents those easy to assemble black or green plastic bins, which heat up well and work great for small spaces.
Microbes love heat and will work much faster to create compost if they are in a warm environment.
Here are four compost bins you can DIY from Treehugger.
THREE BIN COMPOSTER
If you’re up for a bigger project, and you need a lot of compost, a three-bin composter is a great system for maximum compost production. Lots of gardeners use pallets to build this system, but you can also use three separate compost bins side by side if that’s what you have access to.
Here’s how it works:
COMPOST TUMBLER OR ROLLER
This is basically a barrel or bin that can be rolled around - either on the ground or on an axle - to aerate and heat the compost more easily - at least, in theory. It needs to be built well so that it is easy to turn.
A compost tumbler might be a good choice if you have limited space or a rat problem (they can’t get in!) and also the high temperatures will kill most weed seeds, which is a good thing. You can’t use worms, however, since they won’t survive the heat - so that leaves bacteria and fungi to do the work.
INDOOR COMPOSTER
If you’re really short on space and your garden is a balcony or windowsill, you can still compost indoors! You can buy indoor composters, OR you can make one. Apartment Therapy has a tutorial on building an indoor composter that is odor free and fits under your sink.
VERMICOMPOSTING
Vermiculture or Vermicomposting is composting using worms! We plan to explore this method more fully in another Library article, but we simply couldn’t talk about Composting without mentioning it.
Worm castings (worm poop!) is a dang near perfect soil amendment! To make your own worm casting, you need to set up a worm bin system (here’s a great DIY using two totes) add worms to vegetable scraps and shredded paper and let them eat their way through this tasty feast! One pound of worms (about 1000 crawlies) can eat up to half a pound of organic material a day!
A worm compost bin is really simple to DIY and you can source worms from other Vermiculturalists, garden centres, or even on Kijiji! Red Wrigglers are supposedly the best worms for this type of composting. This is such a neat project, especially if you have children in your life.
Cathy’s Crawly Composters is an excellent resource, with videos that demonstrate her neat indoor worm composting system.
Worms are incredible workers in compost systems (except compost tumblers) as they aerate the pile and contribute their castings. If you see lots of a crawlies in your garden, that indicates healthy soil. Thank you worms!!
THE BASIC RECIPE
The key to making great compost is to feed your pile the right mix of materials. The essential ingredients are food scraps and yard waste; the other important elements are moisture, temperature, and oxygen.
Green materials are things like vegetable and fruit scraps, crushed egg shells, coffee grounds, fresh grass clippings, plant trimmings, etc.
Brown materials are things like dry leaves, straw, sawdust, dried grass clippings, shredded newspaper, hair & and animal fur, etc.
Do not compost meat, dairy, fats, bones, pet waste, diseased plants (like tomatoes or potatoes with blight!), or weed seeds.
If you live by the coast (we do!) you can access one of the most incredible gifts of nature - seaweed! You can compost seaweed and make a great tea or liquid fertilizer that will give your gardens a fantastic boost.
ACCELERATE YOUR COMPOST PILE
It’s fairly low maintenance once set up, but there are a few things you can do to help it along.
Watering is important. If it seems too dry, water it; if it seems to wet, add more brown ingredients. You can cover your pile or container with a tarp to keep it from drying out.
Aerating is a great way to accelerate your composting, which is to turn your pile with a fork or shovel regularly to increase the aerobic activity that speeds along decomposition. (Another reason why compost tumblers are great!)
Reducing particle size by chopping up ingredients before you add them to the pile helps the microorganisms do their thing and keeps temperatures optimal.
You don’t have to do these things - your pile will break down eventually - but if you tend your pile regularly, you will produce a lot more compost more quickly.
HOW TO USE FINISHED COMPOST
Valuable Comments
You asked how others compost. This is what a couple of us agingfolks do for winter . . . . .
We are getting older, so our trips to the main compost bins are outof the question now. Our solution is to keep 4 plastic garbage cans near the house as temporary compost bins. This keeps us going during the half of the year when the weather is lousy, and the wood stove is more inviting than the outdoors.
First we drilled small holes in the bottom of each plastic garbagecan – large enough to drain excess liquids, but small enough to keep pests and critters out. Then we stood the cans on pallets to assure good drainage. Our helper lashed all 4 cans and the pallets all together with sturdy weather-proof cord. He also secured each lid with a bungee cord, even though the lids were already fairly tight-fitting. We learned not to trust lids alone after the first few wind storms – it’s no fun tromping through mud and snow in the bush, looking for lost lids!
In the Fall our helper collects bags of dry leaves for us. He fills2 of the cans with just enough leaves to form a cushy layer on the bottom, and the other 2 cans full to the top. These leaves stay dry and available all winter for adding to the greens. It’s much easier to scoop dry leaves out of a garbage can than it is to dig though snow in search of the leaf pile – and then try to pry off a few ice-encrusted leaves!
When winter comes we can easily make the short trip to our temporarycompost bins. Every time we dump a load of kitchen waste into a can, we add some dry leaves from a full can, mix green and brown together, and aerate the whole pile. When a can is full, we top it off with dry leaves, then move to the next can.
It’s easy to rotate around the 4 cans, taking dry leaves from onecan while filling up another with green and brown compost material. Each empty can will need about half of a full can of leaves, so the plan works out well.
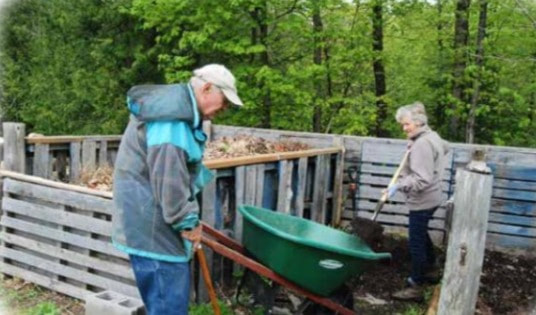
When winter ends and the weather warms up, our helper takes the temporary compost bins down to the main compost area. By then the big wood compost bin is ready to be emptied and sifted. The 4 cans easily fill it back up, together with whatever additives may be needed to help finish the composting cycle – a few scoops of alfalfa pellets for a Nitrogen boost (it’s just unsalted rabbit feed from the farm supply store), dry seaweed collected from the shore, and more dry leaves if the green:brown ratio needs adjusting. In no time at all, we have buckets and buckets of beautiful, sweet-smelling, rich plant food. Compost, at its best!
It’s International Composting Awareness Week, so we thought it perfect timing to share our love of black gold and everything that goes into making it! Good, rich, organic compost is as good as gold to the organic gardener or farmer, and soil health is critical to environmental resilience. Composting - and educating others about it - is one action you take against climate change!
“The 2019 ICAW theme, ‘Cool the Climate - Compost!’ recognizes the connection between soil health and climate. By composting, carbon captured by plants from the atmosphere is returned to the soil. In addition, the compost, when returned to the soil, provides resistance to drought and disease, adds nutrients, improve its workability and reduce the release of nitrous oxide.” (From the Compost Foundation website.)
Our job as gardeners is to build up the organic matter in the soil, and continue to replenish the nutrients that our plants need to thrive. There is a proverb (of unclear origin - some say it’s Japanese, others Chinese)
“The poor farmer grows weeds
The fair farmer grows crops
The Good farmer grows Soil.”
If you invest time and energy into caring for the soil, you’ll be rewarded with healthier, more nutrient dense food! You can buy good organic compost (though sourcing it can be tricky depending on where you live), but there are so many benefits to making your own compost!
BUILDING A BACKYARD COMPOST:
- Produces chemical free and package free fertilizer
- Costs practically nothing (depending on your system)
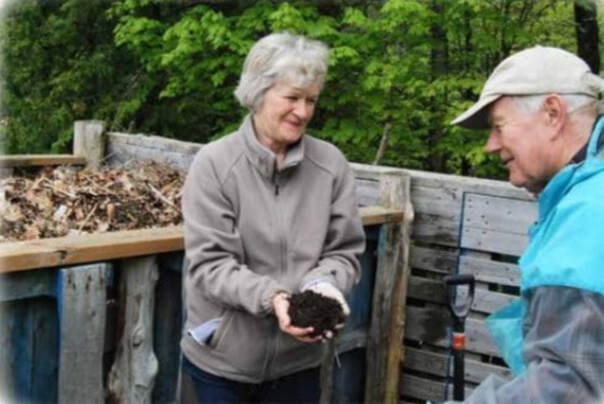
- Encourages beneficial bacteria and fungi that break down organic matter to create nutrient rich humus full of rich organic matter - incredible soil builder!
- Increases your self-sufficiency
- Diverts food waste from the landfill
- Reduces greenhouse gas (when food scraps rot anaerobically in the landfill, without soil, they produce methane)
COMPOST SYSTEMS
Your compost pile could be as simple as a heaped pile at the corner of your yard, or even a trench dug in your garden. We do this in the Fall, after the garden has been put to bed and before the ground freezes. Trench composting is a slower anaerobic process, but still a great alternative to the landfill if you don’t want an above ground compost.
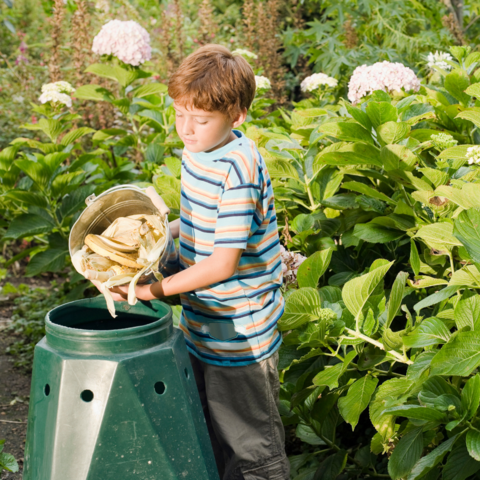
A compost pile is generally easier to manage if you contain it with chicken wire, wood, or a covered bin. A single compost bin is fairly self-explanatory - it can be contained however you like. Some regions and municipalities may even provide residents those easy to assemble black or green plastic bins, which heat up well and work great for small spaces.
Microbes love heat and will work much faster to create compost if they are in a warm environment.
Here are four compost bins you can DIY from Treehugger.
THREE BIN COMPOSTER
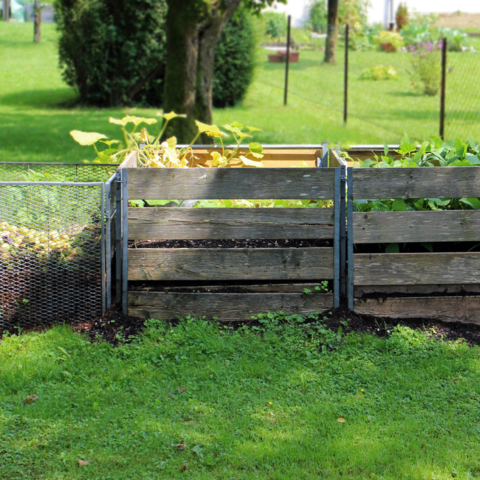
If you’re up for a bigger project, and you need a lot of compost, a three-bin composter is a great system for maximum compost production. Lots of gardeners use pallets to build this system, but you can also use three separate compost bins side by side if that’s what you have access to.
Here’s how it works:
- start a pile in the first bin
- when it’s full, turn it into the second bin (thus aerating it really well!)
- start a new pile in the first bin
- don’t add anything new to the second bin - just aerate and water it (if the weather is dry)
- When bin one is full again, move bin two to the third bin, and bin one to bin two
- Start a new pile in bin one again!
COMPOST TUMBLER OR ROLLER
This is basically a barrel or bin that can be rolled around - either on the ground or on an axle - to aerate and heat the compost more easily - at least, in theory. It needs to be built well so that it is easy to turn.
A compost tumbler might be a good choice if you have limited space or a rat problem (they can’t get in!) and also the high temperatures will kill most weed seeds, which is a good thing. You can’t use worms, however, since they won’t survive the heat - so that leaves bacteria and fungi to do the work.
INDOOR COMPOSTER
If you’re really short on space and your garden is a balcony or windowsill, you can still compost indoors! You can buy indoor composters, OR you can make one. Apartment Therapy has a tutorial on building an indoor composter that is odor free and fits under your sink.
VERMICOMPOSTING
Vermiculture or Vermicomposting is composting using worms! We plan to explore this method more fully in another Library article, but we simply couldn’t talk about Composting without mentioning it.
Worm castings (worm poop!) is a dang near perfect soil amendment! To make your own worm casting, you need to set up a worm bin system (here’s a great DIY using two totes) add worms to vegetable scraps and shredded paper and let them eat their way through this tasty feast! One pound of worms (about 1000 crawlies) can eat up to half a pound of organic material a day!
A worm compost bin is really simple to DIY and you can source worms from other Vermiculturalists, garden centres, or even on Kijiji! Red Wrigglers are supposedly the best worms for this type of composting. This is such a neat project, especially if you have children in your life.
Cathy’s Crawly Composters is an excellent resource, with videos that demonstrate her neat indoor worm composting system.
Worms are incredible workers in compost systems (except compost tumblers) as they aerate the pile and contribute their castings. If you see lots of a crawlies in your garden, that indicates healthy soil. Thank you worms!!
THE BASIC RECIPE
The key to making great compost is to feed your pile the right mix of materials. The essential ingredients are food scraps and yard waste; the other important elements are moisture, temperature, and oxygen.
- Green - or wet - materials are high in nitrogen;
- Brown - dry - materials - are high in carbon.
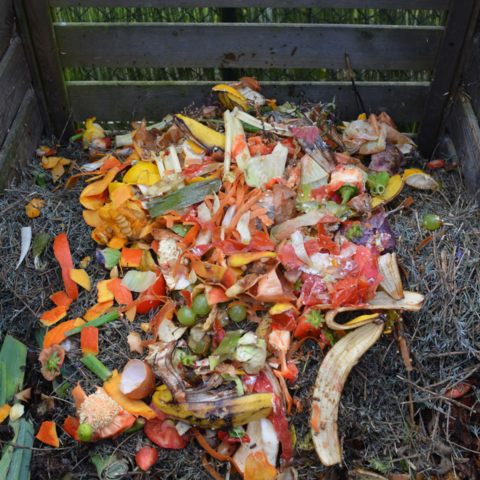
Green materials are things like vegetable and fruit scraps, crushed egg shells, coffee grounds, fresh grass clippings, plant trimmings, etc.
Brown materials are things like dry leaves, straw, sawdust, dried grass clippings, shredded newspaper, hair & and animal fur, etc.
Do not compost meat, dairy, fats, bones, pet waste, diseased plants (like tomatoes or potatoes with blight!), or weed seeds.
If you live by the coast (we do!) you can access one of the most incredible gifts of nature - seaweed! You can compost seaweed and make a great tea or liquid fertilizer that will give your gardens a fantastic boost.
ACCELERATE YOUR COMPOST PILE
It’s fairly low maintenance once set up, but there are a few things you can do to help it along.
Watering is important. If it seems too dry, water it; if it seems to wet, add more brown ingredients. You can cover your pile or container with a tarp to keep it from drying out.
Aerating is a great way to accelerate your composting, which is to turn your pile with a fork or shovel regularly to increase the aerobic activity that speeds along decomposition. (Another reason why compost tumblers are great!)
Reducing particle size by chopping up ingredients before you add them to the pile helps the microorganisms do their thing and keeps temperatures optimal.
You don’t have to do these things - your pile will break down eventually - but if you tend your pile regularly, you will produce a lot more compost more quickly.
HOW TO USE FINISHED COMPOST
- Add it to potting soil for seed starting
- Use as mulch around your perennials, fruit trees, or other plants to retain moisture and keep roots cool and protected in summer.
- Incorporate it into your garden soil to build rich organic matter. The better your soil, the more your plants will thrive and flourish!
- Make compost tea - a natural, organic liquid fertilizer. It’s made exactly the way it sounds! You brew finished compost with water for several days, strain, then use to water plants.
Valuable Comments
You asked how others compost. This is what a couple of us agingfolks do for winter . . . . .
We are getting older, so our trips to the main compost bins are outof the question now. Our solution is to keep 4 plastic garbage cans near the house as temporary compost bins. This keeps us going during the half of the year when the weather is lousy, and the wood stove is more inviting than the outdoors.
First we drilled small holes in the bottom of each plastic garbagecan – large enough to drain excess liquids, but small enough to keep pests and critters out. Then we stood the cans on pallets to assure good drainage. Our helper lashed all 4 cans and the pallets all together with sturdy weather-proof cord. He also secured each lid with a bungee cord, even though the lids were already fairly tight-fitting. We learned not to trust lids alone after the first few wind storms – it’s no fun tromping through mud and snow in the bush, looking for lost lids!
In the Fall our helper collects bags of dry leaves for us. He fills2 of the cans with just enough leaves to form a cushy layer on the bottom, and the other 2 cans full to the top. These leaves stay dry and available all winter for adding to the greens. It’s much easier to scoop dry leaves out of a garbage can than it is to dig though snow in search of the leaf pile – and then try to pry off a few ice-encrusted leaves!
When winter comes we can easily make the short trip to our temporarycompost bins. Every time we dump a load of kitchen waste into a can, we add some dry leaves from a full can, mix green and brown together, and aerate the whole pile. When a can is full, we top it off with dry leaves, then move to the next can.
It’s easy to rotate around the 4 cans, taking dry leaves from onecan while filling up another with green and brown compost material. Each empty can will need about half of a full can of leaves, so the plan works out well.
When winter ends and the weather warms up, our helper takes the temporary compost bins down to the main compost area. By then the big wood compost bin is ready to be emptied and sifted. The 4 cans easily fill it back up, together with whatever additives may be needed to help finish the composting cycle – a few scoops of alfalfa pellets for a Nitrogen boost (it’s just unsalted rabbit feed from the farm supply store), dry seaweed collected from the shore, and more dry leaves if the green:brown ratio needs adjusting. In no time at all, we have buckets and buckets of beautiful, sweet-smelling, rich plant food. Compost, at its best!
